Create magical holiday memories with these simple DIY decorating ideas, from handmade wreaths to festive food displays. Perfect for Canadian families on any budget.
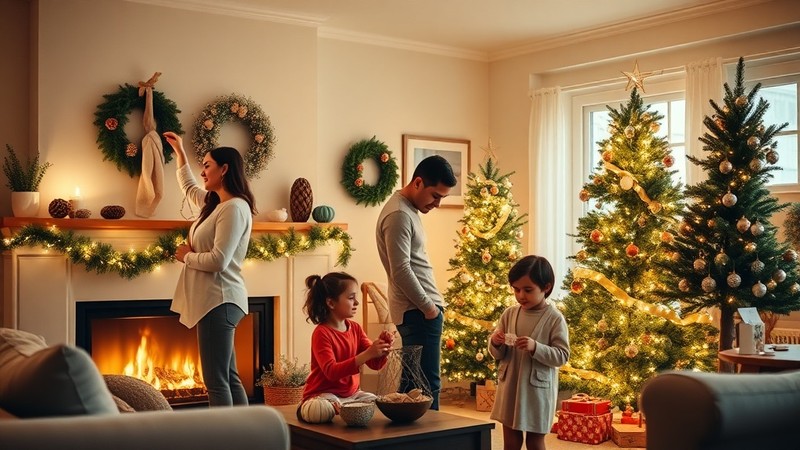
The holiday season is upon us, and there’s nothing quite like transforming your home into a winter wonderland that captures the magic of the season. Whether you’re hosting your first holiday gathering or you’re a seasoned entertainer looking for fresh ideas, these 21 decorating tips will help you create a warm, welcoming atmosphere that brings joy to family and friends alike.
The best part? Most of these ideas use materials you likely already have at home or can easily find at your local craft store. From budget-friendly DIY projects that kids can help with to elegant touches that will impress your guests, these decorating solutions prove that holiday magic doesn’t require a hefty budget—just a little creativity and holiday spirit.
Gift Wrapping Magic
Create Personalized Homemade Gift Wrap
Transform simple brown kraft paper or plain white wrapping paper into something truly special with personal touches that show you care. Skip the expensive designer wrapping papers and create your own unique designs using stamps, stencils, or even your children’s handprints.
For an eco-friendly alternative to traditional ribbon, raid your fabric stash and cut strips of leftover material into various widths. Linen, burlap, vintage lace, or even colorful cotton prints can add texture and charm to your packages. This approach not only saves money but also gives each gift a handmade, thoughtful appearance that recipients will remember long after the holidays are over.
Pro tip: Save pages from old magazines, sheet music, or maps to create unique wrapping paper with character and history.
Craft Adorable Handmade Gift Tags
Elevate your gift-giving game with charming homemade gift tags attached with mini clothespins embellished with glitter tape. Start with cardstock in holiday colours—deep reds, forest greens, or classic gold and silver. Cut them into festive shapes using cookie cutters as templates: stars, trees, bells, or simple rectangles with scalloped edges.
To make the glittery clothespins, simply wrap thin strips of glitter tape around wooden clothespins, overlapping slightly for full coverage. These miniature masterpieces serve double duty as both practical gift attachments and delightful decorative elements that guests might even want to keep as keepsakes.
Materials needed:
- Cardstock in holiday colours
- Mini wooden clothespins
- Glitter tape or washi tape
- Cookie cutters (optional)
- Fine-tip markers or stamps
Maximize Your Gift-Wrapping Space
You don’t need a dedicated gift-wrapping room to stay organized during the busy holiday season. Create an efficient workspace in any corner of your home by designating a small table or even a section of your dining room table as your wrapping headquarters.
Use a vintage muffin tin to organize small items like ribbons, tape, scissors, and embellishments. The individual cups keep everything separated and easily accessible. Store rolls of wrapping paper in a tall basket or umbrella stand, and keep a small cutting mat on hand for precise measurements. This portable setup can be easily moved or put away when you need the space for other activities.
Organization tips:
- Keep gift tags and a pen in one muffin cup
- Store different widths of ribbon in separate cups
- Use double-sided tape for cleaner-looking packages
- Keep a ruler handy for measuring paper
Stunning Ornament Displays
Create Impact with Vintage Ornaments
Sometimes the most elegant decorating solutions are also the simplest. Gather a collection of vintage ornaments—whether they’re family heirlooms passed down through generations or treasures you’ve found at antique shops and holiday markets—and display them in an oversized glass vase, hurricane lantern, or even a large fishbowl.
This approach works particularly well with ornaments in a cohesive colour scheme: all silver and white for a winter wonderland effect, warm golds and bronzes for a traditional feel, or jewel tones for a rich, luxurious appearance. The glass container protects delicate ornaments from curious little hands while still allowing their beauty to shine through.
Styling variations:
- Use different heights of vases for visual interest
- Add battery-operated string lights inside for a magical glow
- Layer different textures (matte, glossy, glittered) for depth
- Include some greenery or pinecones for natural elements
Design Whimsical Winter Vignettes
Create enchanting miniature winter scenes under glass cloches or bell jars using bottle brush trees, tiny plastic or ceramic deer, artificial snow, and other small decorative elements. These charming displays can be placed on mantels, side tables, or as centerpieces for a magical touch that delights both children and adults.
Start with a base layer of artificial snow or white felt, then arrange your trees in varying heights to create depth. Add small figurines, miniature presents wrapped in tiny ribbons, or even LED tea lights for a warm glow. The beauty of these vignettes is that they can be customized to reflect your family’s personality and interests.
Ideas for themed vignettes:
- Woodland scene: Add pinecones, moss, and small woodland creatures
- Village display: Include miniature houses and a small train
- Nativity scene: Use small figurines for a religious theme
- Winter sports: Add tiny skiers, sleds, or ice skaters
Festive Wreaths and Door Decor
Craft a Fragrant Rosemary Wreath
Welcome guests with the most delightfully aromatic first impression by creating a rosemary wreath for your front door. This herb-based decoration not only looks beautiful but also releases a wonderful savory scent every time someone brushes past it or when the wind blows.
To make your rosemary wreath, you’ll need fresh rosemary sprigs, a wire wreath frame, floral wire, and ribbon for hanging. Start by gathering rosemary stems into small bundles, then wire them to your frame, overlapping each bundle to hide the wire and create fullness. The natural oils in rosemary help preserve the wreath, making it last throughout the holiday season.
Step-by-step instructions:
- Soak your wire wreath frame in water for easier handling
- Cut rosemary into 4-6 inch sprigs
- Bundle 3-4 sprigs together
- Wire bundles to frame, working in one direction
- Overlap bundles to cover wire completely
- Add a waterproof ribbon for hanging
Make a Vintage Paper Wreath with Kids
Get the whole family involved in creating a charming wreath using pages from old books, vintage maps, or sheet music. This project is perfect for children of all ages and results in a unique decoration that’s both beautiful and meaningful, especially if you use pages from family books or maps of places you’ve visited together.
Cut the paper into circles of varying sizes, then layer and fold them to create dimensional flowers or rosettes. Attach these paper elements to a foam or wire wreath base using hot glue or craft pins. The vintage look of aged paper gives this wreath a sophisticated, timeless appeal that works with both traditional and modern décor styles.
Creative paper sources:
- Old atlases for a travel theme
- Vintage sheet music for music lovers
- Foreign language books for international flair
- Children’s book pages for a playful touch
Memorable Table Settings and Food Displays
Set Up a Show-Stopping Dessert Buffet
Create an elegant afternoon soirée atmosphere with a thoughtfully arranged dessert buffet that doubles as décor. Use varying heights to create visual interest—place some treats on cake stands, others in beautiful bowls or directly on the table surface. A small glittery tabletop tree serves as an eye-catching centerpiece that ties the whole display together.
The key to a successful dessert buffet is variety in both flavours and textures. Include some store-bought items alongside homemade treats to keep your workload manageable. Think beyond traditional sweets—cheese and crackers, fresh fruit, and nuts provide balance and cater to different dietary preferences.
Buffet styling tips:
- Use odd numbers of items (groups of 3 or 5 look most pleasing)
- Include height variations with cake stands and tiered servers
- Provide small plates and napkins that coordinate with your colour scheme
- Add labels for items containing common allergens
Display Snacks as Decorative Elements
Transform simple party snacks into stunning visual elements by displaying them in tall, clear vases or glass containers. Meringues, gourmet popcorn, and colourful marshmallows become beautiful decoration when artfully arranged in glass vessels of different heights and shapes.
This approach serves multiple purposes: your snacks become part of the décor, guests can easily see and access treats, and you save space that would otherwise be taken up by separate decorative elements. Choose treats in colours that complement your overall holiday palette—white and silver for elegance, red and green for tradition, or gold and bronze for warmth.
Best snacks for display:
- White chocolate-covered pretzels in tall cylinders
- Coloured popcorn in medium bowls
- Peppermint bark pieces in shallow, wide containers
- Holiday cookies arranged on tiered stands
Create Charming Cupcake Toppers
Transform ordinary bakery cupcakes into personalized treats with adorable homemade toppers. Small plastic figures like reindeer, snowmen, or Santa figures can be attached to toothpicks or small wooden skewers. Alternatively, cut shapes from cardstock and decorate them with glitter, stamps, or drawings.
These toppers are particularly wonderful because they give you the convenience of store-bought cupcakes with the personal touch of homemade decoration. Kids love helping with this project, and you can customize toppers to match your party theme or individual guests’ interests.
Topper ideas:
- Photo toppers: Small family photos on sticks
- Message toppers: Holiday wishes written on small flags
- Themed shapes: Stars, trees, presents, or candy canes
- Edible toppers: Chocolate pieces or candy decorations
Make Fruit Fun and Festive
Elevate ordinary fruit platters by cutting fresh fruit into festive shapes using small cookie cutters. Apples, pears, and even thick slices of oranges can be transformed into stars, trees, hearts, or bells. This simple technique makes healthy options more appealing to children and adds visual interest to your food display.
Choose cookie cutters that are small enough to work with your fruit sizes but large enough to create substantial pieces. Pat fruit dry after cutting to prevent excess moisture, and brush apple and pear pieces with a little lemon juice to prevent browning.
Best fruits for cutting:
- Apples: Hold their shape well and come in festive red and green
- Pears: Sweet and seasonal, perfect for gold colour schemes
- Oranges: Bright and cheerful, great for winter vitamin C
- Watermelon: If available, creates beautiful contrast
Thoughtful Party Favours and Extras
Create Meaningful Take-Home Gifts
Send young guests home with a special memento by creating simple party favours that tie into your holiday theme. Paper globes with tags stamped “Peace on Earth” offer a meaningful message while remaining budget-friendly and easy to make in batches.
To make these favours, purchase small paper globe ornaments from a craft store, or create your own using blue and green tissue paper over small foam balls. Attach kraft paper tags with holiday messages using thin ribbon or twine. These thoughtful gifts remind families of your gathering long after the holidays are over.
Other meaningful favour ideas:
- Seed packets with spring flowers for hope and renewal
- Small picture frames with group photos from the party
- Homemade cookies in clear bags with ribbon
- Mini ornaments with the year and your family name
Design Stylish Drink Accessories
Help guests keep track of their beverages while adding a chic touch to your party with handmade washi tape stir sticks. These colourful accessories are incredibly easy to make and can be customized to match any colour scheme or theme.
Simply wrap wooden stir sticks or coffee stirrers with decorative washi tape, overlapping slightly and pressing firmly to ensure good adhesion. Make several dozen in different patterns so guests can choose their favourites. The tape also makes it easy for people to identify their drinks throughout the party.
Washi tape design ideas:
- Colour coordination: Match your party’s main colours
- Pattern mixing: Combine stripes, dots, and florals
- Metallic accents: Gold and silver for elegant affairs
- Theme-specific: Choose patterns that match your holiday décor
Beverage Stations That Wow
Set Up a Family-Friendly Soda Station
Create excitement for guests of all ages with a DIY beverage station featuring homemade flavoured sodas. Using a home carbonation system or simply mixing fruit syrups with sparkling water, you can offer unique, refreshing drinks that become a conversation starter and entertainment in themselves.
Display the drink station on a decorated table with various flavoured syrups in attractive bottles, fresh fruit garnishes, and special glasses or mason jars. Provide small chalkboard signs labeling each flavour, and consider offering both regular and sugar-free options to accommodate different dietary needs.
Popular homemade soda flavours:
- Cranberry-pomegranate for festive red colour
- Apple-cinnamon for cozy winter warmth
- Orange-ginger for a zesty kick
- Vanilla-cream for a classic treat
Create an Elegant Self-Serve Bar
Ensure you can actually enjoy your own party by setting up a self-serve bar area where adult guests can help themselves to beverages throughout the evening. This approach keeps you from playing bartender all night while providing an attractive focal point for your entertaining space.
Include a variety of options: wine, beer, a signature holiday cocktail, and non-alcoholic alternatives. Provide all necessary accessories including ice, garnishes, cocktail napkins, and appropriate glassware. A small chalkboard or printed menu can help guests understand their options and any special drink recipes you’ve prepared.
Self-serve bar essentials:
- Ice bucket with tongs or scoop
- Cocktail napkins in coordinating colours
- Garnishes like lemon twists, cranberries, or herbs
- Recipe cards for signature drinks
- Bottle opener and corkscrew in easy-to-find locations
Ambient Lighting and Seasonal Scents
Add Musical Welcome with Jingle Bell Door Rings
Create a festive audio element by hanging beautiful jingle bell ribbon rings on every door handle throughout your home. Every time someone enters or exits a room, they’ll be greeted with cheerful holiday sounds that add to the magical atmosphere.
Make these charming decorations using various sizes of jingle bells attached to coordinating ribbon. Choose ribbons in colours that complement your existing décor, and vary the bell arrangements—some rings might have just a few large bells, while others feature clusters of smaller ones for different tonal qualities.
Bell ring variations:
- Single large bell on wide velvet ribbon for elegant simplicity
- Cluster of small bells for more dramatic jingling
- Mixed sizes for complex, musical sounds
- Colour themes matching each room’s décor
Create Warm Ambiance with DIY Votives
Transform the mood of any room with handmade patterned votives that cast beautiful shadows and create intimate lighting. Using simple materials like decorative paper, doilies, or even leaves, you can create custom luminaries that add warmth and elegance to your holiday decorating.
Wrap glass votive holders with patterned paper, doilies, or fabric, securing with double-sided tape or spray adhesive. When you light the candles inside, the patterns will project onto nearby walls and surfaces, creating moving shadows that dance and flicker with the candlelight.
Pattern ideas for votives:
- Paper snowflakes for winter themes
- Lace doilies for vintage elegance
- Sheet music for music lovers
- Pressed leaves for natural beauty
Fill Your Home with Sweet Scents
Create delightful, edible ornaments that fill your home with the warm scent of cinnamon and spices. These DIY cinnamon gingerbread ornaments are perfect projects for children and result in decorations that engage multiple senses throughout the holiday season.
Mix cinnamon, applesauce, and a small amount of glue to create a moldable dough that can be rolled out and cut with cookie cutters. After air-drying for several days, these ornaments can be hung throughout your home, tucked into garlands, or given as gifts. The natural cinnamon scent lasts for weeks, providing ongoing aromatic enjoyment.
Cinnamon ornament recipe:
- 1 cup ground cinnamon
- 1/3 cup applesauce
- 2 tablespoons white school glue
- Mix, roll, cut, and air dry for 2-3 days
Modern Touches and Artistic Elements
Create Elegant Snowflake Gardens
Design a sophisticated winter display using white paper snowflakes in varying sizes arranged as a “garden” in a decorative container. This modern take on traditional snowflake crafts results in an elegant decoration that fits seamlessly with contemporary home décor.
Cut snowflakes from different weights of white paper—from delicate tissue paper to sturdy cardstock—and mount them on thin wooden dowels or floral wire stems. Arrange them in a white vase or container filled with white sand, pearl beads, or artificial snow for a cohesive, monochromatic look that’s both striking and serene.
Snowflake garden tips:
- Use varying heights for visual interest
- Include different sizes from tiny to large
- Mix paper textures for depth
- Add subtle shimmer with pearl spray
Display Modern Holiday Art
Give your home an instant festive update by switching out existing framed artwork with modern holiday prints. This approach allows you to embrace the season without investing in permanent decorative items that need storage space year-round.
Create or download contemporary designs featuring stylized Santa figures, geometric reindeer, minimalist Christmas trees, or abstract winter scenes. Print them on quality paper and display in matching frames grouped together for maximum impact. This modern approach to holiday decorating appeals to adults while still creating festive cheer.
Modern art display ideas:
- Trio of coordinating prints in matching frames
- Black and white holiday graphics for sophisticated appeal
- Geometric patterns in traditional holiday colours
- Typography-based designs with holiday messages
Craft Beautiful Paper Poinsettia Wreaths
Create stunning wreaths using handmade paper poinsettias that look surprisingly realistic and can be customized to match your exact colour preferences. These elegant decorations work beautifully as door wreaths, wall art, or table centerpieces and can be made in any size to fit your space.
Layer different shades of tissue paper or crepe paper to create dimensional poinsettia blooms, then attach them to a foam wreath base. The paper flowers can be made in traditional red and green, elegant whites and golds, or any colour combination that complements your holiday décor scheme.
Paper poinsettia techniques:
- Layer colours for realistic depth
- Vary bloom sizes for natural appearance
- Add texture with different paper types
- Include greenery with paper or real leaves
Final Thoughts: Making Holiday Magic on Any Budget
The beauty of these holiday decorating ideas lies in their accessibility and adaptability. Whether you’re working with a generous decorating budget or need to keep costs minimal, these projects can be scaled and modified to work for your family’s situation. Many of these decorations can become cherished annual traditions, with children helping more each year as they grow and develop new skills.
Remember that the most important aspect of holiday decorating isn’t perfection or expense—it’s the joy and warmth these elements bring to your home and the memories you create while making them. Some of your family’s most treasured holiday traditions might start with a simple afternoon spent crafting ornaments or arranging treat displays together.
Key takeaways for successful holiday decorating:
- Start with what you have and build gradually each year
- Involve the whole family in age-appropriate projects
- Focus on creating atmosphere rather than achieving perfection
- Document the process with photos to remember the fun
- Store decorations carefully so they can be enjoyed for years to come
These 21 tips provide a foundation for creating a warm, welcoming holiday atmosphere that reflects your family’s personality and brings joy to everyone who enters your home. The magic isn’t in the decorations themselves—it’s in the love, creativity, and togetherness that goes into making them special.