Transform ordinary fruits and vegetables into a cheerful message that celebrates warmer weather while encouraging healthy eating habits
After what feels like an endless winter, there’s nothing quite like those first warm spring days to lift everyone’s spirits. As Canadian families eagerly await the snow to melt and the first crocuses to bloom, why not celebrate the changing season with a fun, interactive snack that’s as nutritious as it is adorable?
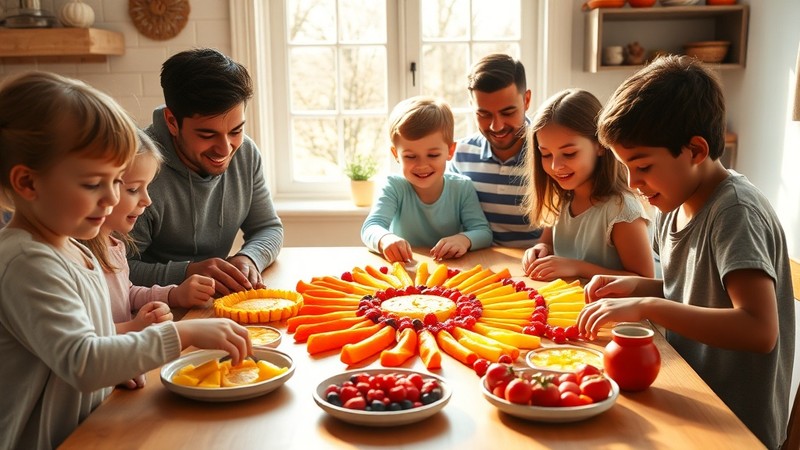
This “Hello Sunshine” snack craft combines the joy of creative play with the benefits of healthy eating, making it an ideal activity for kids who might otherwise turn their noses up at fruits and vegetables. Plus, it’s a wonderful way to spend quality time together in the kitchen while teaching children about colours, letters, and nutritious foods.
Why Food Crafts Are Perfect for Kids
Building Positive Food Relationships
When children participate in preparing their own snacks, they’re more likely to try new foods and develop positive associations with healthy eating. This hands-on approach transforms snack time from a potential battle into an exciting creative adventure.
Educational Benefits
This simple activity incorporates multiple learning opportunities:
- Letter recognition as kids form each letter with different foods
- Colour identification with the rainbow of fruits and vegetables
- Fine motor skills development through arranging and placing food pieces
- Nutritional awareness as you discuss the benefits of each ingredient
Perfect for Various Occasions
This cheerful snack works beautifully for:
- After-school snacks
- Weekend family activities
- Playdates and small gatherings
- Rainy day indoor fun
- Spring-themed parties or celebrations
Gathering Your Sunshine Ingredients
What You’ll Need:
- 1 slice of navel orange (for the sun)
- 1 pineapple ring (fresh or canned in juice, for sun rays)
- 1 strip of yellow bell pepper (for the letter H)
- 1 strip of red apple (for the letter E)
- 1 strip of celery (for the first L)
- 1 strip of carrot (for the second L)
- 1 slice of kiwi (for the letter O)
- Sharp kitchen knife (adult use only)
- Large plate or tray for arranging
Smart Shopping Tips
For the freshest ingredients:
- Choose oranges that feel heavy for their size and have bright, unblemished skin
- Select pineapples with fresh-looking green leaves and a sweet smell at the base
- Pick bell peppers that are firm and glossy
- Look for apples that are crisp and free of soft spots
- Choose celery with bright green leaves and firm stalks
- Select carrots that are firm and vibrant orange
- Pick kiwis that yield slightly to gentle pressure but aren’t mushy
Step-by-Step Assembly Guide
Creating Your Edible Masterpiece
Step 1: Prepare Your Workspace Set up a clean, flat surface with all ingredients washed and ready. This is a great time to involve kids in the washing process—they love helping with “grown-up” kitchen tasks.
Step 2: Create the Sun Place the orange slice on the bottom portion of your plate. This bright, circular piece serves as the cheerful sun that anchors your entire design. The natural segments of the orange add beautiful texture and visual interest.
Step 3: Add Sun Rays Take your pineapple ring and carefully slice it into small triangular pieces. These will become the sun’s rays, radiating outward from your orange. Arrange them around the orange slice, spacing them evenly for the most appealing look. The sweet, tropical flavour of pineapple adds a delightful contrast to the citrusy orange.
Step 4: Spell Out “HELLO”
For the letter H: Cut your yellow bell pepper strip into three pieces—two longer pieces for the vertical lines and one shorter piece for the horizontal connecting line. Arrange these to form a clear “H” shape on your plate.
For the letter E: Use your red apple strip and cut it into four pieces—one longer piece for the vertical line and three shorter pieces for the horizontal lines (top, middle, and bottom). The natural red colour of the apple creates beautiful contrast against the other ingredients.
For the first L: Cut your celery strip into two pieces—one longer piece for the vertical line and one shorter piece for the horizontal bottom line. The crisp, fresh flavour and bright green colour add both nutrition and visual appeal.
For the second L: Repeat the same cutting pattern with your carrot strip. The vibrant orange colour complements the sun beautifully while providing a satisfying crunch.
For the letter O: Simply place your kiwi slice on the plate. The natural round shape is perfect for this letter, and the beautiful green colour with its distinctive pattern adds an exotic touch to your snack craft.
Nutritional Powerhouse Benefits
Orange: Vitamin C Champion
Oranges are packed with vitamin C, which supports immune system health—especially important as seasons change. They also provide folate, potassium, and beneficial plant compounds called flavonoids.
Pineapple: Digestive Helper
This tropical fruit contains bromelain, an enzyme that aids digestion. It’s also rich in vitamin C and manganese, which supports bone health and wound healing.
Bell Pepper: Antioxidant Superstar
Yellow bell peppers contain even more vitamin C than oranges, plus vitamin A for eye health and antioxidants that help protect cells from damage.
Apple: Fiber Friend
The saying “an apple a day keeps the doctor away” holds merit—apples provide fiber for digestive health and quercetin, a compound that may support heart health.
Celery: Hydration Hero
With its high water content, celery helps with hydration while providing vitamin K for bone health and potassium for heart function.
Carrot: Vision Supporter
Rich in beta-carotene (which the body converts to vitamin A), carrots support eye health and immune function while adding natural sweetness.
Kiwi: Nutrient Dense Delight
Despite their small size, kiwis pack more vitamin C than oranges and provide fiber, vitamin E, and potassium in a perfectly portion-sized package.
Creative Variations and Extensions
Seasonal Adaptations
Summer Version: Replace some ingredients with seasonal fruits like strawberries, peaches, or berries Fall Version: Incorporate apple slices, pear pieces, and orange vegetables like sweet potato Winter Version: Use citrus fruits, pomegranate seeds, and stored root vegetables
Educational Extensions
- Alphabet Practice: Create other words or spell out family members’ names
- Colour Sorting: Group similar coloured fruits and vegetables before assembly
- Counting Games: Count the pieces needed for each letter
- Geography Lesson: Discuss where each fruit and vegetable grows
Dietary Modifications
For Food Allergies: Substitute any problematic ingredients with safe alternatives For Texture Sensitivities: Choose softer or crunchier alternatives based on preferences For Different Tastes: Let kids choose their favourite fruits and vegetables for each letter
Making It a Family Tradition
Weekly Snack Craft Time
Consider designating one day each week as “snack craft day,” rotating through different themes and messages. This creates anticipation and gives children something special to look forward to.
Special Occasion Messages
Use this technique to create:
- “HAPPY BIRTHDAY” for celebrations
- “GET WELL” for family members who are under the weather
- “LOVE YOU” for Valentine’s Day or just because
- “WELCOME” for guests or new neighbours
Involving Different Ages
Toddlers (2-3 years): Can help wash ingredients and place larger pieces Preschoolers (4-5 years): Can identify colours and letters while helping arrange pieces School-age (6+ years): Can help with safe cutting tasks and create their own designs
Storage and Safety Tips
Food Safety Essentials
- Always wash hands before handling food
- Use separate cutting boards for different ingredients if desired
- Consume the snack within 2 hours of assembly if left at room temperature
- Store prepared ingredients separately in the refrigerator for up to 2 days
Make-Ahead Options
Prepare cut fruits and vegetables the night before and store in airtight containers. This makes assembly quick and easy when hungry kids are waiting.
Involving Kids Safely
Always supervise children around sharp knives and consider age-appropriate tasks. Younger children can focus on washing, arranging, and creative input while adults handle the cutting.
Troubleshooting Common Challenges
“My Child Won’t Try New Foods”
Start with familiar favourites and gradually introduce one new item at a time. The fun presentation often encourages even picky eaters to give something new a try.
“The Letters Don’t Look Perfect”
Remember that imperfection is part of the charm! Focus on the fun and creativity rather than precision. Kids often feel more proud of slightly wonky letters they helped create.
“Some Pieces Fall Apart”
Choose slightly firmer fruits and vegetables, and cut pieces just before assembly. If something crumbles, simply incorporate it into the design or use it as “decoration” around the letters.
Beyond the Snack: Learning Opportunities
Science Connections
Discuss how plants grow, where different fruits and vegetables come from, and why eating a variety of colours is important for our bodies.
Art Integration
Take photos of your creations and create a seasonal snack craft album. Kids love documenting their culinary masterpieces.
Cultural Exploration
Explore fruits and vegetables from different cultures and countries, expanding both palates and worldviews.
Conclusion: Welcoming Sunshine Year-Round
This delightful “Hello Sunshine” snack proves that healthy eating doesn’t have to be boring or feel like a chore. By transforming nutritious fruits and vegetables into an interactive craft, you’re creating positive food associations that can last a lifetime.
Whether you’re celebrating the end of a long Canadian winter, brightening a cloudy day, or simply looking for a fun way to incorporate more produce into your family’s diet, this cheerful snack delivers on multiple levels. It nourishes growing bodies, engages creative minds, and provides precious family bonding time—all while sending a bright, optimistic message that’s sure to bring smiles to faces of all ages.
So gather your colourful ingredients, invite the kids to join you in the kitchen, and get ready to say “Hello Sunshine” in the most delicious way possible. After all, sometimes the best way to welcome brighter days is to create a little sunshine of your own, one healthy, happy snack at a time.