This holiday craft is super easy to make and is a delightful twist on the traditional evergreen wreath
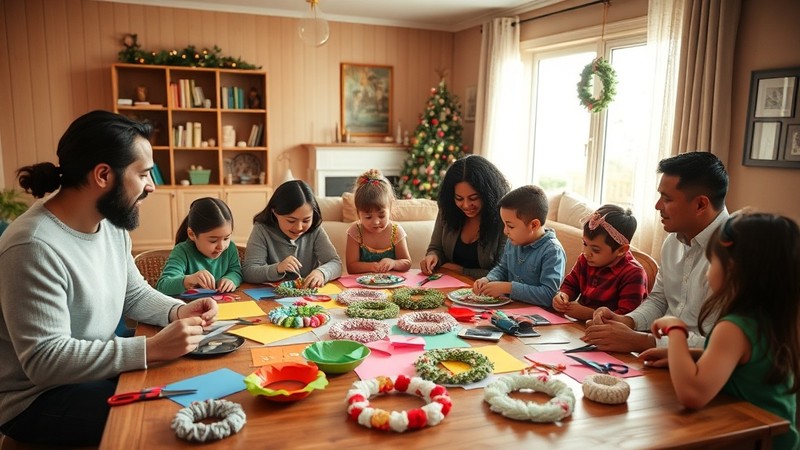
The magic of Christmas crafting with kids lies in those precious moments when their faces light up as they create something beautiful with their own hands. This construction paper wreath is the perfect project to capture that joy while creating a festive decoration that will proudly hang on your door or wall throughout the holiday season.
What makes this craft particularly special is its simplicity and versatility. Unlike traditional wreaths that require expensive materials or complex techniques, this paper version uses supplies you likely already have at home. It’s an excellent introduction to holiday crafting for toddlers and preschoolers, while still being engaging enough for older children who can add their own creative flourishes.
The finished wreath has a wonderfully dimensional, almost slinky-like appearance that kids absolutely love. The layered paper strips create beautiful depth and movement, making it look far more sophisticated than its simple construction would suggest.
What You’ll Need
Essential Materials:
- Green construction paper (4-6 sheets depending on desired fullness)
- Coloured scrap paper for decorative elements
- White or cream paper for snowflakes or other accents
- Ruler or measuring tape
- Child-safe scissors (adult scissors for precision cutting)
- Stapler with staples
- Glue stick or white craft glue
- Pencil for marking measurements
Optional Enhancement Materials:
- Ribbon for hanging loop
- Glitter or glitter glue for sparkle
- Stickers (stars, holly, Christmas trees)
- Markers or crayons for additional decoration
- Cotton balls for snow effect
- Red construction paper for berries or bows
Tools That Make It Easier:
- Paper cutter for precise strips (adult use only)
- Circle template or compass for perfect round base
- Hole punch for hanging holes
Step-by-Step Instructions
Step 1: Prepare Your Workspace
Set up a clean, flat surface with good lighting. Lay out newspapers or a craft mat to protect your table. Having all materials within easy reach will help keep kids engaged and prevent frustration. Consider using small bowls or containers to organize smaller items like buttons or stickers.
Step 2: Create the Base Circle
Start by cutting a large circle from one sheet of green construction paper. The circle should be approximately 8-10 inches in diameter for a standard-sized wreath. For younger children, you can pre-cut this base, or help them trace around a large plate or bowl.
Next, cut a smaller circle from the center, about 3-4 inches in diameter. This creates the classic wreath shape with a hollow center. Save the small circle piece—it can be used for other decorative elements later!
Step 3: Cut Your Paper Strips
This is where the magic happens! Cut the remaining green construction paper into strips approximately 1 inch wide and 6-8 inches long. You’ll need quite a few strips to create a full, lush-looking wreath—aim for 40-60 strips depending on your desired thickness.
Pro tip: Older children can help with measuring and cutting straight lines, while younger ones can assist by holding the ruler or collecting the finished strips in a basket.
Step 4: Create the Loops
Take each paper strip and form it into a loop, overlapping the ends by about half an inch. Secure with a small staple or dot of glue. The loops don’t need to be perfect—slight variations actually add to the wreath’s organic, handmade charm.
Safety note: Adult supervision is essential when using staplers. Consider pre-stapling loops for very young children, or use glue dots as a safer alternative.
Step 5: Attach the Loops
Begin attaching your paper loops around the outer edge of your base circle. Overlap each loop slightly with the next, creating layers and depth. Work your way around the entire outer perimeter first.
Once the outer edge is complete, start a second row of loops slightly inside the first row. Continue adding rows until you reach the inner circle, creating a full, dimensional appearance.
Step 6: Add Decorative Elements
Now comes the fun part—personalization! Use your coloured scrap paper to create small decorative elements:
- Holly leaves and berries: Cut holly leaf shapes from dark green paper and small circles from red paper
- Snowflakes: Fold white paper and cut intricate patterns
- Stars: Use yellow or gold paper for celestial accents
- Bows: Create a classic red bow for the bottom of the wreath
Step 7: Final Assembly and Hanging
Glue your decorative elements onto the wreath, distributing them evenly for visual balance. Add a ribbon loop to the back for hanging, or punch a small hole at the top if you prefer to use a nail or hook.
Creative Variations and Themes
Rainbow Holiday Wreath
Break away from traditional green and create a vibrant rainbow wreath using strips in red, orange, yellow, green, blue, and purple. This version is especially appealing to younger children and adds a playful pop of colour to your holiday décor.
Winter Wonderland Theme
Use white, light blue, and silver paper strips to create a winter-themed wreath. Add cotton ball “snow” and silver glitter for a magical frosty effect.
Candy Cane Stripe Pattern
Alternate red and white paper strips to create a candy cane-inspired wreath. This bold pattern is eye-catching and distinctly festive.
Nature-Inspired Version
Use brown and green strips as a base, then add paper cutouts of woodland animals, pinecones, and acorns for a rustic, nature-themed approach.
Age-Appropriate Adaptations
For Toddlers (Ages 2-3):
- Pre-cut all pieces and let them focus on gluing loops onto the base
- Use large, chunky pieces that are easy to handle
- Stick to simple colour schemes to avoid overwhelming choices
- Emphasize the sensory experience of touching and arranging materials
For Preschoolers (Ages 4-5):
- Involve them in measuring and cutting with supervision
- Encourage pattern-making with colours
- Let them create their own decorative elements
- Introduce basic concepts like “outer,” “inner,” and “overlapping”
For School-Age Children (Ages 6+):
- Challenge them to create precise measurements and cuts
- Encourage elaborate decorative themes
- Introduce more complex techniques like paper quilling for accents
- Have them write and illustrate their own instruction cards for siblings
Learning Opportunities Hidden in the Craft
This seemingly simple craft actually incorporates numerous learning opportunities:
Mathematical Concepts:
- Geometry: Circles, circumference, diameter
- Measurement: Using rulers, estimating lengths
- Patterns: Creating and recognizing colour sequences
- Counting: Tallying strips and decorative elements
Fine Motor Development:
- Scissor skills: Improving cutting accuracy and control
- Hand-eye coordination: Placing elements precisely
- Bilateral coordination: Using both hands together effectively
- Finger strength: Manipulating small pieces and tools
Creative Problem-Solving:
- Spatial reasoning: Understanding how pieces fit together
- Planning: Visualizing the final product
- Adaptation: Modifying designs when materials run short
- Aesthetic judgment: Making colour and placement decisions
Troubleshooting Common Challenges
“My strips keep breaking!”
This usually happens when children pull too hard on the paper. Demonstrate gentle handling and consider using slightly thicker paper or cardstock for more durability.
“It doesn’t look full enough!”
More loops almost always solve this problem. Don’t be afraid to add extra layers—the beauty is in the abundance of texture and dimension.
“The loops won’t stay attached!”
If glue isn’t holding well, try using a few staples in strategic locations, or allow more drying time between adding layers.
“My wreath looks lopsided!”
Step back and identify areas that need more loops. Sometimes rotating the wreath as you work helps maintain balance.
Storage and Display Tips
Proper Storage:
Store your finished wreath flat in a large box with tissue paper between layers if stacking multiple crafts. Avoid crushing the dimensional loops by providing adequate space.
Creative Display Ideas:
- Front door: Weather-proof with a protective coating
- Children’s bedroom doors: Let them proudly display their creation
- Classroom walls: Perfect for school holiday displays
- Gift presentation: Attach to gift bags or use as unique wrapping
Educational Extensions
Literature Connections:
Read books about Christmas traditions around the world and discuss how different cultures create holiday decorations. This craft can lead to conversations about family traditions and cultural celebrations.
Science Connections:
Explore the properties of paper—how it bends, tears, and holds shapes. Discuss the physics of why loops create dimension and how layering creates visual depth.
Social Studies Connections:
Research the history of wreaths and their significance in different cultures. Ancient Romans used wreaths as symbols of victory, while Christians adapted the circular shape to represent eternal life.
Making It a Family Tradition
Consider making this craft an annual tradition, with each family member creating their own version. Document the evolution of skills and creativity over the years with photos. You might even create a special storage box for each year’s wreaths, bringing them out during holiday decorating to see how techniques and artistic abilities have grown.
Safety Reminders
While this is generally a very safe craft, keep these precautions in mind:
- Supervise scissor use at all times with young children
- Check for paper cuts on little fingers
- Ensure stapler safety by keeping it in adult hands
- Monitor glue consumption as some children may be tempted to taste it
- Keep small decorative elements away from children who still put things in their mouths
Budget-Friendly Tips
This craft is naturally economical, but here are ways to make it even more budget-friendly:
- Repurpose materials: Use pages from old magazines, wrapping paper scraps, or junk mail
- Share supplies: Coordinate with other families to buy materials in bulk
- Save throughout the year: Collect interesting papers and store them for holiday crafting
- Use natural alternatives: Collect fallen leaves in autumn and preserve them for winter crafting
Conclusion
The construction paper wreath represents everything wonderful about holiday crafting with children. It’s accessible, creative, educational, and results in something genuinely beautiful that families can display with pride. More importantly, it creates those precious shared moments that become treasured family memories.
The beauty of this craft lies not just in its simplicity, but in its ability to grow with your child. A three-year-old’s enthusiastic, slightly crooked version is just as precious as an eight-year-old’s precisely measured masterpiece. Each wreath tells the story of a child’s development, creativity, and the special time spent creating something meaningful together.
So gather your supplies, clear your crafting space, and prepare for an afternoon of holiday magic. Your construction paper wreath will not only brighten your home for the holidays—it will brighten hearts and create memories that last far beyond the season.