Transform your kitchen into a laboratory with these simple, safe science experiments that spark curiosity and create magical learning moments for kids of all ages.
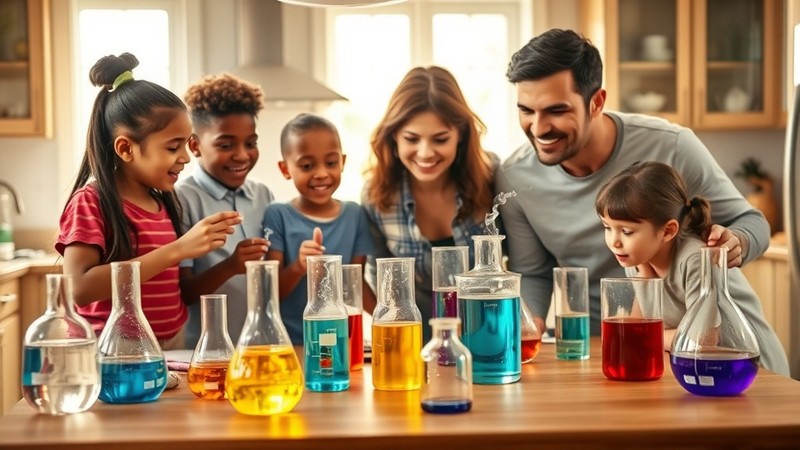
There’s something truly magical about watching your child’s eyes light up when they witness science in action. Whether it’s the wonder of seeing a rainbow appear before their eyes or the delight of watching raisins dance in a glass, home science experiments offer incredible opportunities to nurture curiosity, develop critical thinking skills, and create lasting memories together as a family.
The beauty of at-home science lies in its accessibility. You don’t need expensive equipment or dangerous chemicals—many of the most fascinating experiments can be conducted using everyday household items you likely already have in your kitchen or bathroom cabinet. These hands-on activities not only entertain but also lay the foundation for STEAM (Science, Technology, Engineering, Arts, and Mathematics) learning that will serve your children well throughout their educational journey.
Why Home Science Experiments Matter for Child Development
Before we dive into our three featured experiments, it’s worth understanding why these activities are so valuable for growing minds. Science experiments at home offer multiple developmental benefits:
Cognitive Development: Children learn to observe, hypothesize, test, and draw conclusions—fundamental skills that extend far beyond science class.
Fine Motor Skills: Many experiments involve measuring, pouring, and manipulating materials, which strengthen hand-eye coordination and dexterity.
Language Development: Discussing observations, asking questions, and learning new vocabulary words naturally occurs during experimental play.
Confidence Building: Successfully completing experiments gives children a sense of accomplishment and encourages them to tackle new challenges.
Family Bonding: Working together on projects creates shared experiences and opens up natural opportunities for meaningful conversations.
Safety First: Creating a Safe Home Laboratory
Before beginning any experiment, establish some basic safety guidelines with your children:
- Always wash hands before and after experiments
- Wear old clothes or aprons to protect clothing
- Keep experiments away from electronics and important documents
- Adult supervision is required for all activities
- Clean up spills immediately to prevent slips
- Never taste experimental materials unless specifically instructed
- Have towels and cleaning supplies readily available
Experiment #1: Create a Spectacular Rainbow
Age Range: 3+ (with supervision), 6+ (more independence) Time Required: 10-15 minutes Difficulty Level: Beginner
What You’ll Need:
- One clear drinking glass
- Water
- One sheet of white paper
- Flashlight
- Masking tape or electrical tape
- A darkened room for best results
Step-by-Step Instructions:
-
Prepare your workspace: Choose a room where you can dim the lights. Position a chair or table near a wall where you can place your paper on the floor.
-
Set up the glass: Fill the glass with water about 3/4 full. Place it on the edge of a counter or table so part of the glass hangs over the edge. This positioning is crucial for the light to pass through at the right angle.
-
Modify your flashlight: Cover the light end of the flashlight with masking tape, leaving only a thin slit about 1/4 inch wide. This creates a focused beam of light rather than a broad, scattered light.
-
Position the paper: Place the white sheet of paper on the floor directly in front of where the glass is positioned. The paper should be about 2-3 feet away from the glass.
-
Create magic: Turn off the room lights and shine the flashlight through the glass of water, aiming the beam toward the paper on the floor. Adjust the angle until you see a beautiful rainbow appear on the paper.
Why It Works: The Science Behind Rainbows
This experiment demonstrates the fascinating phenomenon of light refraction and dispersion. White light, which appears colourless to our eyes, is actually composed of all the colours of the rainbow—red, orange, yellow, green, blue, indigo, and violet (often remembered by the acronym ROYGBIV).
When light passes from one medium (air) into another (water), it bends or refracts because it travels at different speeds in different materials. Each colour of light bends at a slightly different angle because each has a different wavelength. This separation of white light into its component colours is called dispersion.
In nature, we see rainbows when sunlight passes through millions of tiny water droplets in the air after a rainstorm. Each droplet acts like a tiny prism, bending and separating the light just like our glass of water does in this experiment.
Extension Activities:
- Try using different shaped glasses (wine glasses, mason jars, etc.) to see how the shape affects the rainbow
- Experiment with different light sources like phone flashlights or laser pointers (adult supervision required)
- Create multiple rainbows using several glasses
- Take photos of your rainbows to compare different attempts
Experiment #2: Dancing Raisins Extravaganza
Age Range: 2+ (with supervision), 5+ (more independence) Time Required: 15-20 minutes active observation Difficulty Level: Beginner
What You’ll Need:
- One tall, clear glass or transparent container
- Clear carbonated beverage (club soda, Sprite, or clear cola work well)
- 8-10 raisins (fresh ones work best)
- Optional: other small items to test (uncooked rice, small pasta pieces, cereal)
Step-by-Step Instructions:
-
Choose your beverage: Pour the carbonated drink into your tall glass, filling it about 3/4 full. The fresher and more carbonated the beverage, the better your results will be.
-
Add the dancers: Gently drop 5-8 raisins into the glass one at a time. Watch carefully as they initially sink to the bottom.
-
Observe the magic: Within 30 seconds to 2 minutes, you should start seeing the raisins rise to the surface, then sink back down again. This “dancing” will continue for several minutes.
-
Document observations: Encourage your child to describe what they’re seeing. Count how many times each raisin rises and falls. Time how long it takes for raisins to travel from bottom to top.
-
Experiment with variables: Try adding different objects to see what happens. Do they all dance the same way?
Why It Works: Understanding Buoyancy and Density
This delightful experiment demonstrates several important scientific principles working together:
Carbon Dioxide Bubbles: Carbonated beverages contain dissolved carbon dioxide gas under pressure. When you open the bottle or can, this gas begins to escape, forming the bubbles you see rising to the surface.
Surface Attachment: The rough, textured surface of raisins provides perfect attachment points for these tiny CO2 bubbles. As bubbles accumulate on the raisin’s surface, they act like tiny life jackets.
Buoyancy Changes: Initially, raisins sink because they’re denser than the liquid. However, as bubbles attach to their surface, the overall density of the raisin-bubble combination becomes less than the liquid, causing them to rise.
Surface Release: When raisins reach the surface, the bubbles pop and release their gas into the air. Without their “bubble life jackets,” the raisins become dense enough to sink again, and the cycle repeats.
Extension Activities:
- Compare different carbonated beverages to see which creates the most active dancing
- Test various small objects (popcorn kernels, small pieces of pasta, cereal) to see which dance best
- Create a hypothesis about why some objects dance better than others
- Try the experiment with flat soda to see what happens without carbonation
Troubleshooting Tips:
- If raisins don’t dance, try fresher, more carbonated soda
- Very old or soft raisins may not work as well
- Room temperature beverages often work better than cold ones
- If bubbles form too quickly, try gently stirring to release excess gas
Experiment #3: Magical Slime Creation
Age Range: 4+ (with close supervision), 8+ (more independence) Time Required: 20-30 minutes Difficulty Level: Intermediate
What You’ll Need:
- 1/2 cup white school glue (brands like Elmer’s work best)
- 1/2 cup water (for glue mixture)
- 1 cup water (for Borax solution)
- 1 teaspoon Borax powder (available in laundry aisles)
- Food colouring (optional)
- Two mixing bowls
- Measuring cups and spoons
- Wooden spoon or plastic stirrer
- Adult supervision required
Important Safety Note:
Borax should only be handled by adults or older children with direct supervision. Ensure children don’t put hands near their mouths during this experiment and wash hands thoroughly afterward.
Step-by-Step Instructions:
-
Prepare the glue mixture: In the first bowl, combine 1/2 cup of white glue with 1/2 cup of water. Stir until well mixed. This is a great time to add 3-4 drops of food colouring if you want coloured slime.
-
Create the Borax solution: In the second bowl, have an adult dissolve 1 teaspoon of Borax powder in 1 cup of warm water. Stir until the Borax is completely dissolved. This solution is what transforms the glue from liquid to slime.
-
The magical transformation: Slowly pour the Borax solution into the glue mixture while stirring continuously. You’ll immediately see the mixture begin to change texture and pull away from the sides of the bowl.
-
Hands-on mixing: Once the mixture becomes too thick to stir, it’s time for hands-on action. Remove the forming slime from the bowl and knead it with your hands for 2-3 minutes until it becomes smooth and less sticky.
-
Perfect your slime: If the slime feels too sticky, knead it a bit more. If it seems too stiff, you can work in a few drops of water. The perfect slime should stretch without breaking immediately and bounce when dropped.
Why It Works: Polymer Chemistry Made Simple
This experiment introduces children to the fascinating world of polymer chemistry in a hands-on way:
Understanding Polymers: White school glue contains polyvinyl acetate, which consists of long chains of molecules called polymers. Think of these chains like cooked spaghetti noodles floating in sauce—they can move around freely and slide past each other.
Cross-Linking Magic: Borax acts as a cross-linking agent, creating bridges between these polymer chains. Imagine taking those spaghetti noodles and connecting them with tiny bridges—suddenly they can’t slide around as freely, creating the unique stretchy, bouncy properties of slime.
Non-Newtonian Fluid: The resulting slime is what scientists call a non-Newtonian fluid, meaning it behaves differently under different conditions. When you poke it quickly, it feels solid, but when you let it rest in your palm, it flows like a liquid.
Slime Science Experiments:
Once you’ve created your basic slime, try these additional investigations:
- Stretch test: How far can you stretch your slime before it breaks?
- Bounce test: Drop balls of slime from different heights to test elasticity
- Flow test: Place slime in a container and time how long it takes to flatten
- Temperature test: Put slime in the refrigerator for 30 minutes, then compare its properties to room-temperature slime
Storage and Care:
Store your slime in an airtight container or plastic bag. It should last 1-2 weeks if kept sealed. If it becomes too stiff, knead in a few drops of water. If it becomes too sticky, let it air dry for a few minutes.
Creating a Science-Rich Home Environment
These three experiments are just the beginning of your family’s science adventure. Here are ways to extend the learning and create a more science-rich environment at home:
Document Your Discoveries
Start a family science journal where you record:
- Hypotheses before each experiment
- Step-by-step observations
- Results and conclusions
- Ideas for future experiments
- Photos or drawings of your work
Ask Wonder Questions
Encourage curiosity by asking open-ended questions:
- “What do you think will happen if we change this?”
- “Why do you think that occurred?”
- “What else could we try?”
- “How is this similar to something we see in nature?”
Connect to Daily Life
Help children notice science everywhere:
- Why does soap make bubbles?
- How do airplanes stay in the sky?
- What makes plants grow toward windows?
- Why do ice cubes melt?
Build a Simple Science Kit
Create a designated container with basic supplies for spontaneous experiments:
- Food colouring
- Baking soda and vinegar
- Various containers and measuring tools
- Magnifying glass
- pH strips
- Small household items for testing
Age-Appropriate Adaptations
For Younger Children (Ages 2-5):
- Focus on observation and sensory exploration
- Use simple vocabulary and relate to familiar concepts
- Emphasize the “wow factor” over detailed explanations
- Allow plenty of time for free exploration
- Be prepared for messier outcomes
For Older Children (Ages 6-12):
- Introduce hypothesis formation and testing
- Encourage measurement and data recording
- Discuss the science behind observations
- Challenge them to design their own variations
- Connect experiments to school science concepts
For Teens (Ages 13+):
- Explore more complex chemical and physical principles
- Research the history behind discoveries
- Design controlled experiments with variables
- Connect to real-world applications and careers
- Encourage teaching younger siblings
Building Scientific Thinking Skills
Beyond the immediate fun and excitement, these experiments help develop crucial thinking skills:
Observation Skills: Learning to notice details, changes, and patterns develops attention to detail that benefits all areas of learning.
Critical Thinking: Asking “why” and “what if” questions encourages analytical thinking and problem-solving abilities.
Patience and Persistence: Some experiments require multiple attempts or careful timing, teaching valuable life skills.
Communication Skills: Describing observations and explaining results builds vocabulary and expression abilities.
Mathematical Connections: Measuring, timing, and comparing results naturally incorporates math concepts into learning.
When Things Don’t Go as Planned
Remember that “failed” experiments are often the most educational. If your rainbow doesn’t appear, your raisins don’t dance, or your slime turns out too gooey, use these moments as learning opportunities:
- Discuss what might have gone wrong
- Brainstorm solutions together
- Try the experiment again with modifications
- Research online or in books for troubleshooting tips
- Celebrate the learning process, not just successful outcomes
Expanding Your Science Adventures
Once you’ve mastered these three experiments, consider exploring:
- Chemistry: Volcano eruptions with baking soda and vinegar, crystal growing, pH testing with red cabbage
- Physics: Simple machines, density towers, magnetic investigations
- Biology: Growing seeds, observing insects, microscopic investigations
- Earth Science: Weather stations, rock and mineral identification, water cycle demonstrations
Making Science a Family Tradition
Consider establishing regular “Science Saturday” sessions or “Wonder Wednesday” investigations. This creates anticipation and makes scientific exploration a cherished family tradition rather than just an occasional activity.
Remember, the goal isn’t to create future scientists (though that’s wonderful if it happens), but to nurture curious, confident learners who approach the world with wonder and aren’t afraid to ask questions, make mistakes, and keep exploring.
These simple experiments using household items prove that some of the most meaningful learning happens right at home, around your kitchen table, with the people you love most. So gather your supplies, put on your scientist caps, and prepare for some magical moments of discovery that will spark curiosity and create memories to last a lifetime.
The world is full of scientific wonders waiting to be explored—and your home laboratory is the perfect place to begin that lifelong journey of discovery together.